


Lifestyle
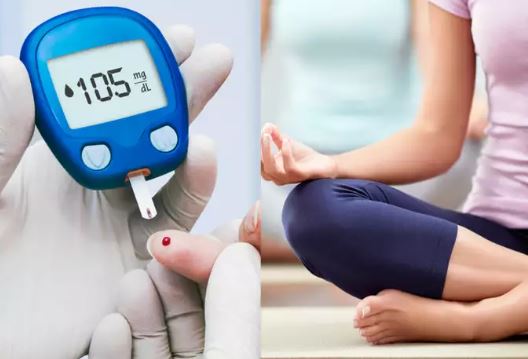
5 yoga postures which can help you in combating diabetes
The yogic culture is being adapted worldwide and included in workout regime. It helps in improving a person’s mental and physical well-being.
Moreover, this meditative form of physical movement also has several medicinal benefits. Yoga can immensely help you if you are diabetic.
It can reduce your blood pressure and sugar levels. As yoga calms your senses, it can also prevent you from heart diseases.
Yoga is commendable for those suffering from diabetes as it helps to control blood glucose levels when practised regularly.
Let’s come across a few yoga postures which can help in curing diabetes.
1. Legs-Up-the-Wall-Pose
This is a relaxing exercise which helps in managing your stress levels. It keeps your blood pressure and blood sugar levels low. In addition to that, this posture can also help in providing respite to headaches, increase energy and circulation.
Hamstrings, pelvic muscles, lower back, front torso and back of the neck are the body muscles which have been targeted.
How to perform:
Step 1- Lie down comfortably on a yoga mat, swing your legs up against the wall in such a manner that your body should form a 90-degree angle.
Step 2- Try to make the lower region of your pelvis touch the wall, relax your neck, chin, and throat.
Step 3- Spread your arms sideways in such a manner that your palms should face upwards. Practice this posture for 5 to 15 minutes, relax your body gradually by gliding your legs down.
2. Reclining bound angle pose
This pose helps in relieving your nervous system. It also keeps your blood pressure and sugar levels in control. It is also known to accentuate the functioning of abdominal organs, bladder, and kidneys.
Adductors, pelvic muscles, groin muscles and psoas are the muscles which can be bettered by performing this exercise.
How to perform:
Step 1: Sit in a butterfly pose on your yoga mat, the soles of your feet should touch each other, and your knees should be placed in a horizontal manner facing sideways.
Step 2 : Gradually recline your back, making it touch the floor. Relax your pelvis and rest your hands on the sides of your body.
Step 3: Stay in this position for 10 minutes and use your hands to lift your knees so that you can release your body back to normal.
3. Seated forward bend
This posture is remedial for weight loss and keeping blood pressure in control. It also helps in curing anxiety, headaches, and tiredness.
Pelvic muscles, erector spinae, gluteus maximus and gastrocnemius are the muscles which are focused while performing it.
How to perform:
Step 1 : Sit in such a posture that you are able to elongate your legs by keeping them straight.
Step 2 : Try making your toes bend backwards so that you can touch them with your hands, in this position your torso should touch your legs and your spine should be straight. Remain in this pose for 3 minutes.
4. Supported shoulder stand
This posture might help in speeding circulation and bracing the thyroid gland. It also helps in making you feel peaceful and rejuvenated.
Trapezius, rotator cuff, quadriceps, and rectus abdominis are the muscles which can be altered while practicing this exercise.
How to perform:
Step 1: Lie down on the mat, you can also use a folded blanket to rest your shoulders upon. Make sure that your shoulders are in contact with the edges of the blanket.
Step 2 : Rest your hands at the sides of your body by making your palms touch the ground.
Step 3: Gradually make your legs touch your head by moving them in the backward direction. You can take support of your fingers to balance your lower back, make sure to keep your fingers straight.
Step 4: Now raise your legs up making your shoulders, spine and hips form a single line. Stay in this position for 30 seconds to 3 minutes.
Step 5: Ease your body by releasing your spine downwards to the yoga mat and lower your legs.
5. Supine spinal twist
This posture helps in accentuating the functioning of the abdominal organs which can lead to a fall in the blood sugar levels. It can also help in curing pain and stiffness of your back, spine and hips.
Rectus abdominis, trapezius, pectoralis major and erector spinae are the muscles which are benefited while performing this.
How to perform:
Step 1: Lay straight on your mat and fold your knees like a wheel, touching your chest.
Step 2 : Place your arms sideways, making your palms touch the ground. Bend your folded knees towards the left direction. Make sure that your knees are adjacent with your hips.
Step 3: You can utilize your hands in adding a slight pressure on your knees. Stay in this position for 30 seconds and then practice it on your right side.